The English Brix Guide to Greatness
Logging In
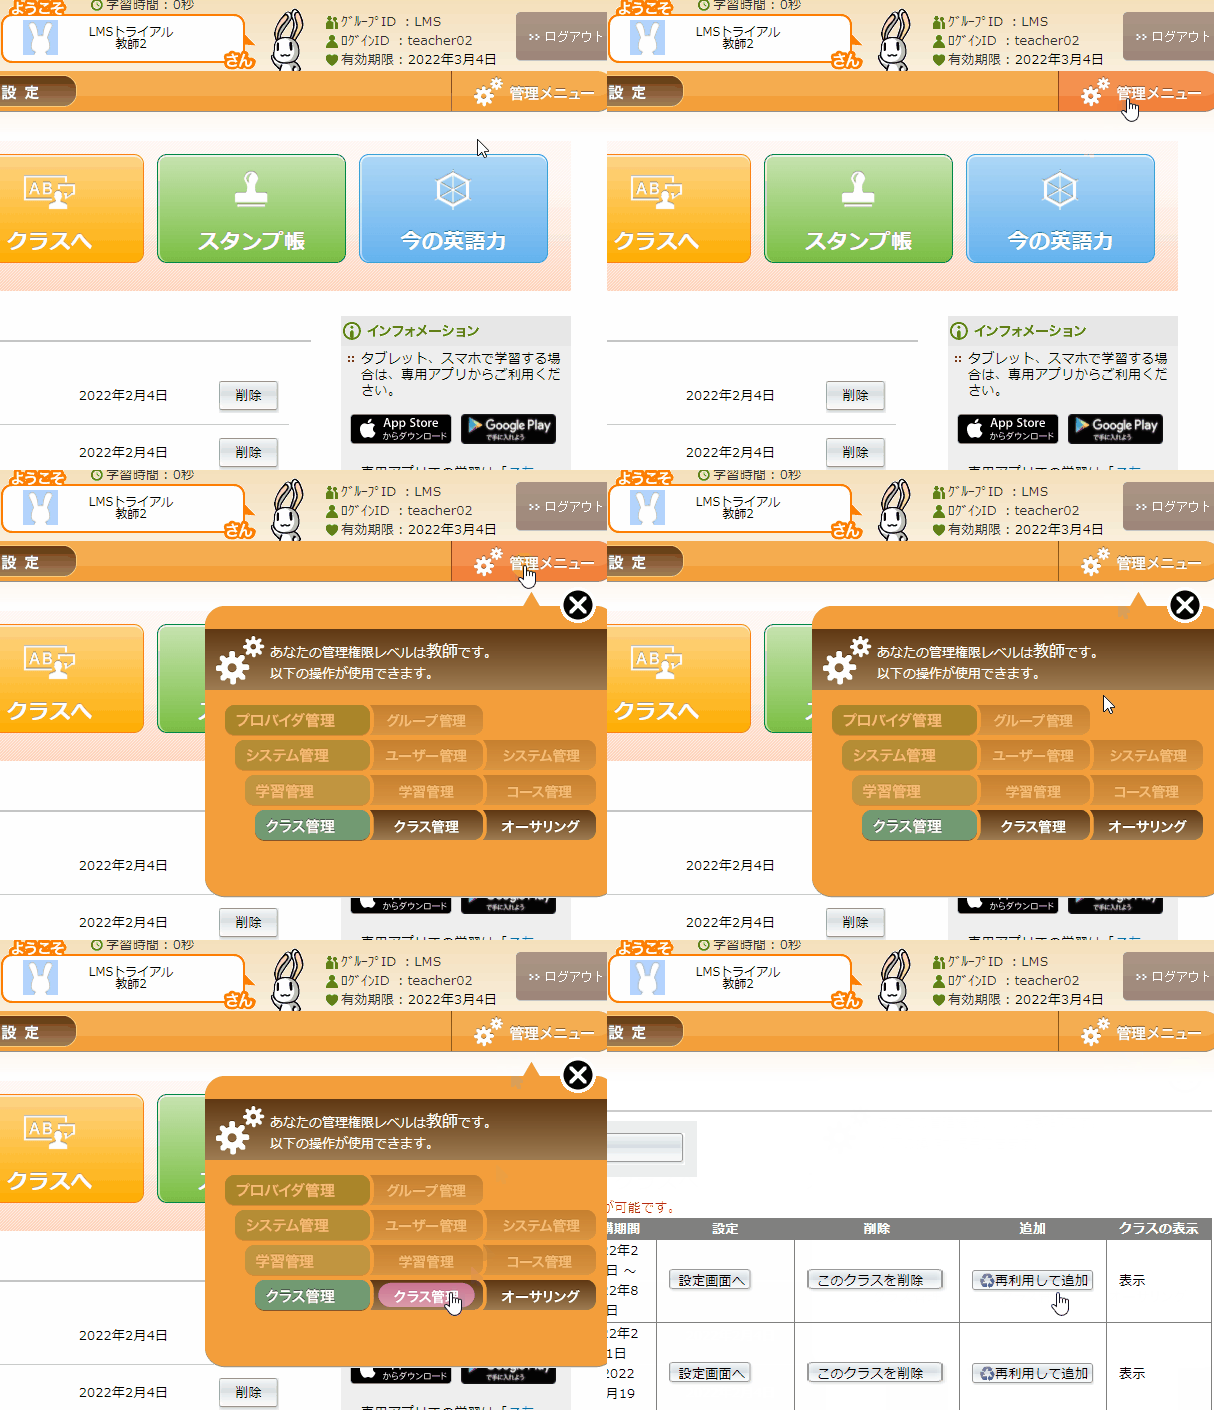
Use your favorite web browser to access the login page. Login with your credentials. Once logged in, click on the 'gears' at the top right of the screen. In the dropdown menu, click on the button クラス管理 (Classroom/Class management).
Making a Class
Naming and Making
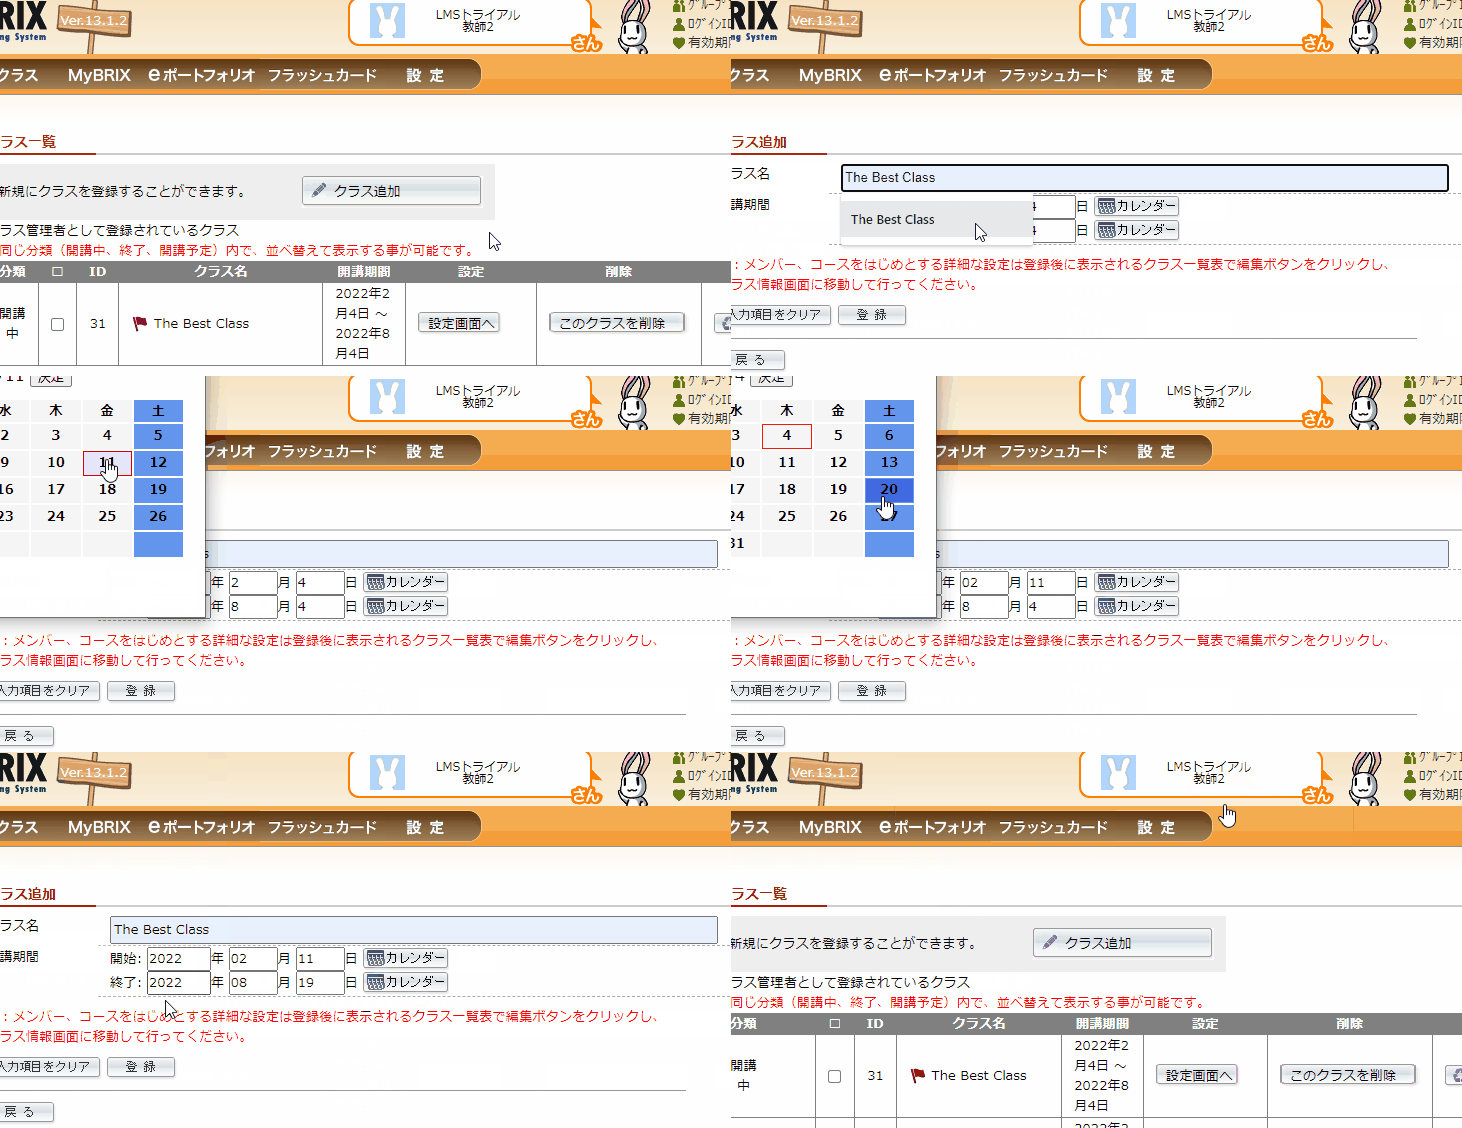
- Click on
クラス追加in the top middle of the page. - Enter the name of your class and select when your class will start and finish
- After your satisfied with your choices, click the
登録button.
Adding students
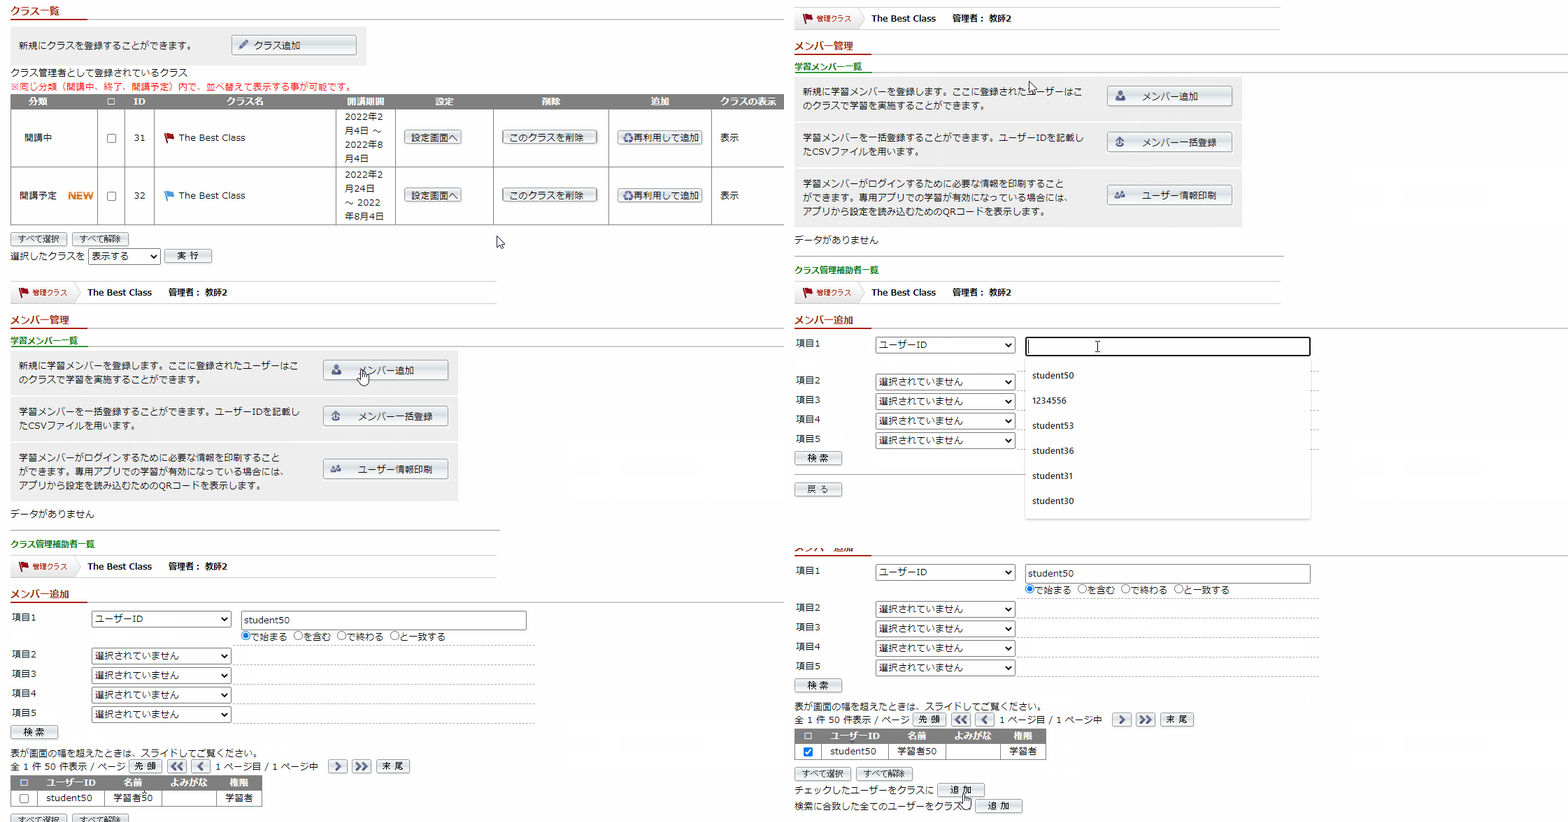
- From the class dashboard (the place where you can see your newly created class)
- Click the
設定画面へbutton - Click on the button labeled
メンバー管理near the top of the screen
Here is where you will be able to add and remove students from your class.
- Click the first button,
メンバー追加 - From the drop-down menu, choose how you would like to search for your student (e.g. by ID - ユーザーID). You can use the other drop-down boxes to narrow your search if necessary.
- Type in the user id and click
検索at the bottom of the list - A list will be created, and you should hopefully see the student(s) you searched for
- Click the little box next to the student ID then click the first
追加 - Your student is now in your class
Adding Learning Materials
- From your
クラス情報設定(the page with all the buttons), click onコース設定, the button bellow the user button (ユーザー追加) - Click
コースを選択to look at all the available courses
There will be a warning that will pop-up. Don't worry, it just says "Oh by the way you only have the option of choosing two kinds of learning materials".
- You will see all of the available learning materials
- Find the course you desire and click the
選択button - Click the
共有button and accept the warning that pops up

Adding Due Dates
The Brix system allows the teacher to set due dates for each unit of the course material.
- From
クラス情報設定, click the third buttonコース実施画面 - From the drop-down menu, find the course (learning materials) you would like to set-up
- click the
ユニット表示button on the far right - Each unit is displayed in order
- If the list is too long, you can shorten it by using the second drop down menu
- Once you have a list you can work with, click the calendar icon for the respective unit and choose the start and end date for each unit
- Once you are finished, click the
登録button near the bottom of the page

Note: If you don't set a due date, or a start date, the student will be able to start the section / unit anytime they want.
Adding Goals
The Brix system requires goals for each course/learning material you selected. The Goals page is split into two goals, one for 'completion' or 'progress' and other for 'grades'.
Progress Goal
- Again from your
クラス情報設定page, click on公式目標設定 - At the top of the page, click the calendar button and choose the end date for your course
- Bellow that, put the desired percentage of completion you would like your students to achieve (eg. 100 for 100% of the course completed)
- Click the
すべて選択button to select all the units/parts of the learning material, then move on to the next part
Grade Goal
- Just like you did for the progress goal, choose the end date you want your students to achieve their grade / score / result goal
- In the box bellow the date, type in the passing grade for the course
- The drop down box to the left of the 'point' box is where you can choose between
平均(cumulative average) or 最低 (minimum score). I (Justin) assume that 'cumulative average' will average a range of grades, some low some high, whereas the minimum score measurement won’t mark a unit as passed unless they meet the minimum requirement for each part. - Just like setting the Progress Goal, click
すべて選択to select all the units - Finally click the
登録button and all the red pop-up buttons
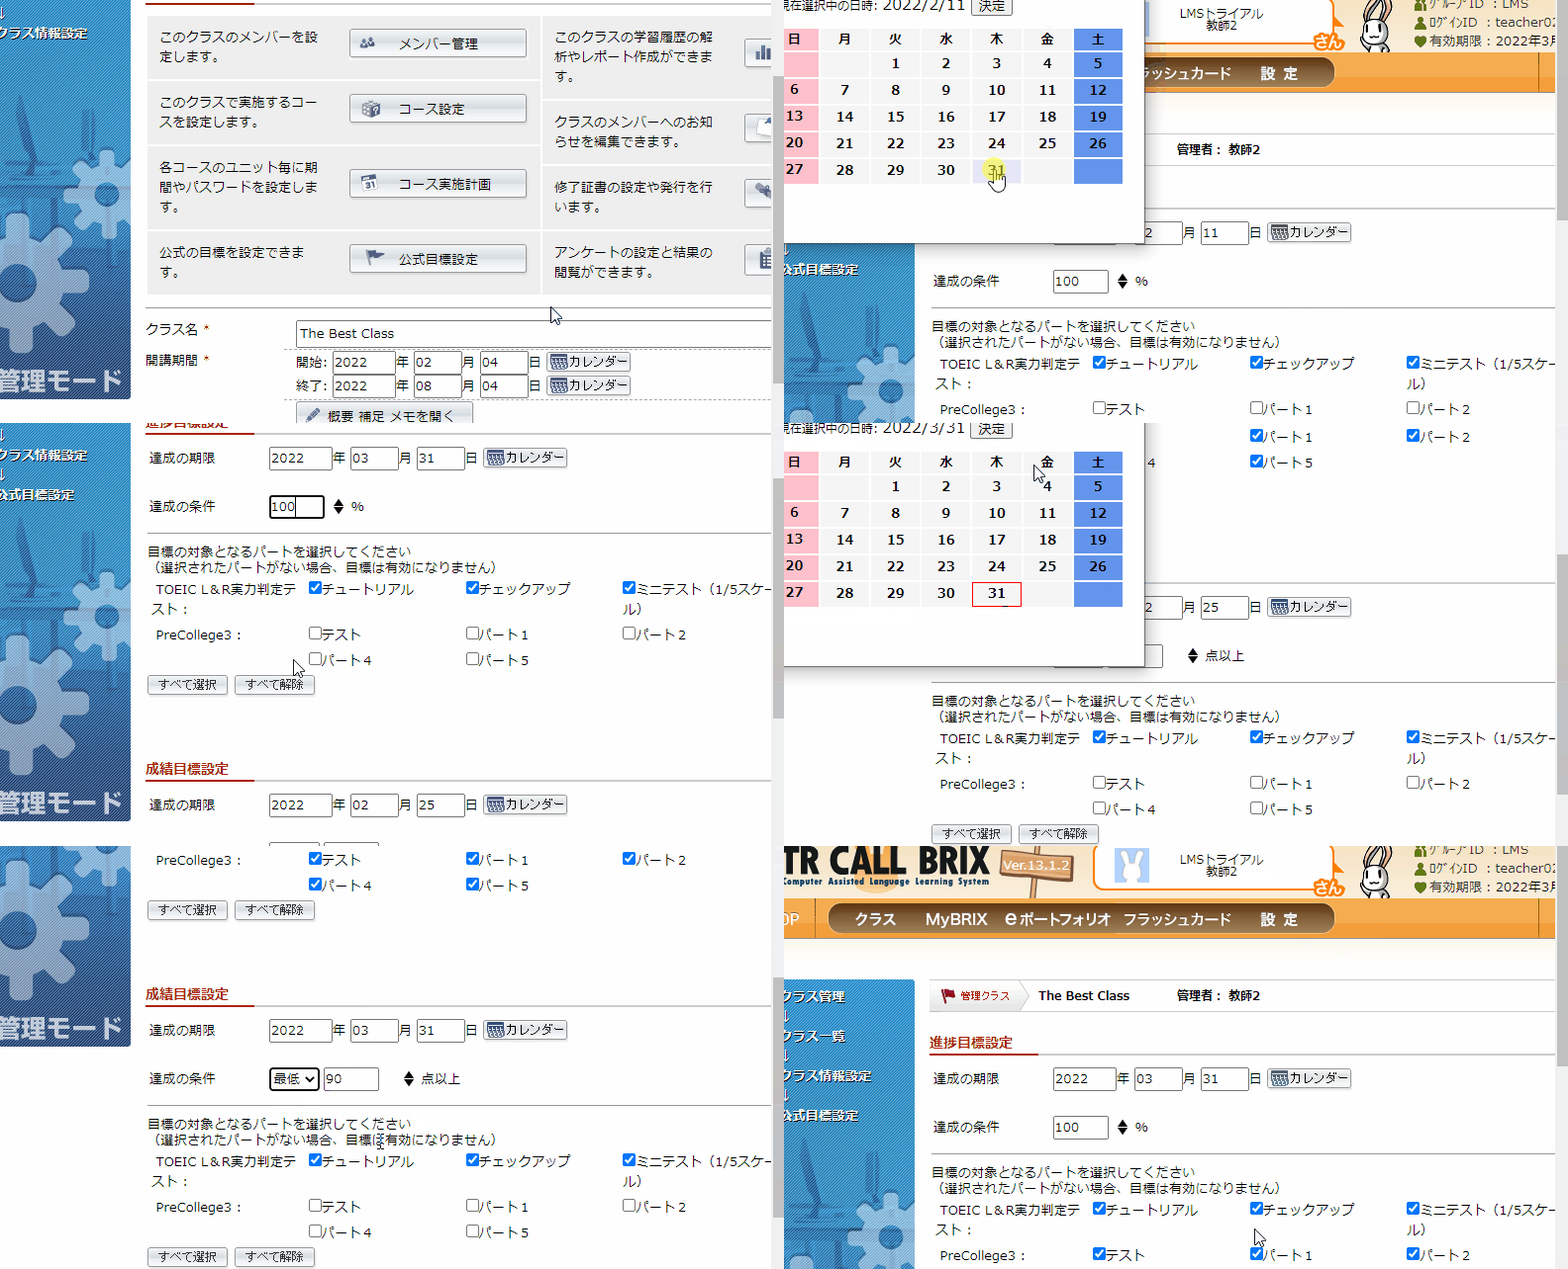
And your done!
Checking On Your Students
Grades and Progress
- From the Class Settings Page click the
学習実績・解析on the right column - Click the first button
学習者の画面表示 - Search for your student by using the drop down boxes
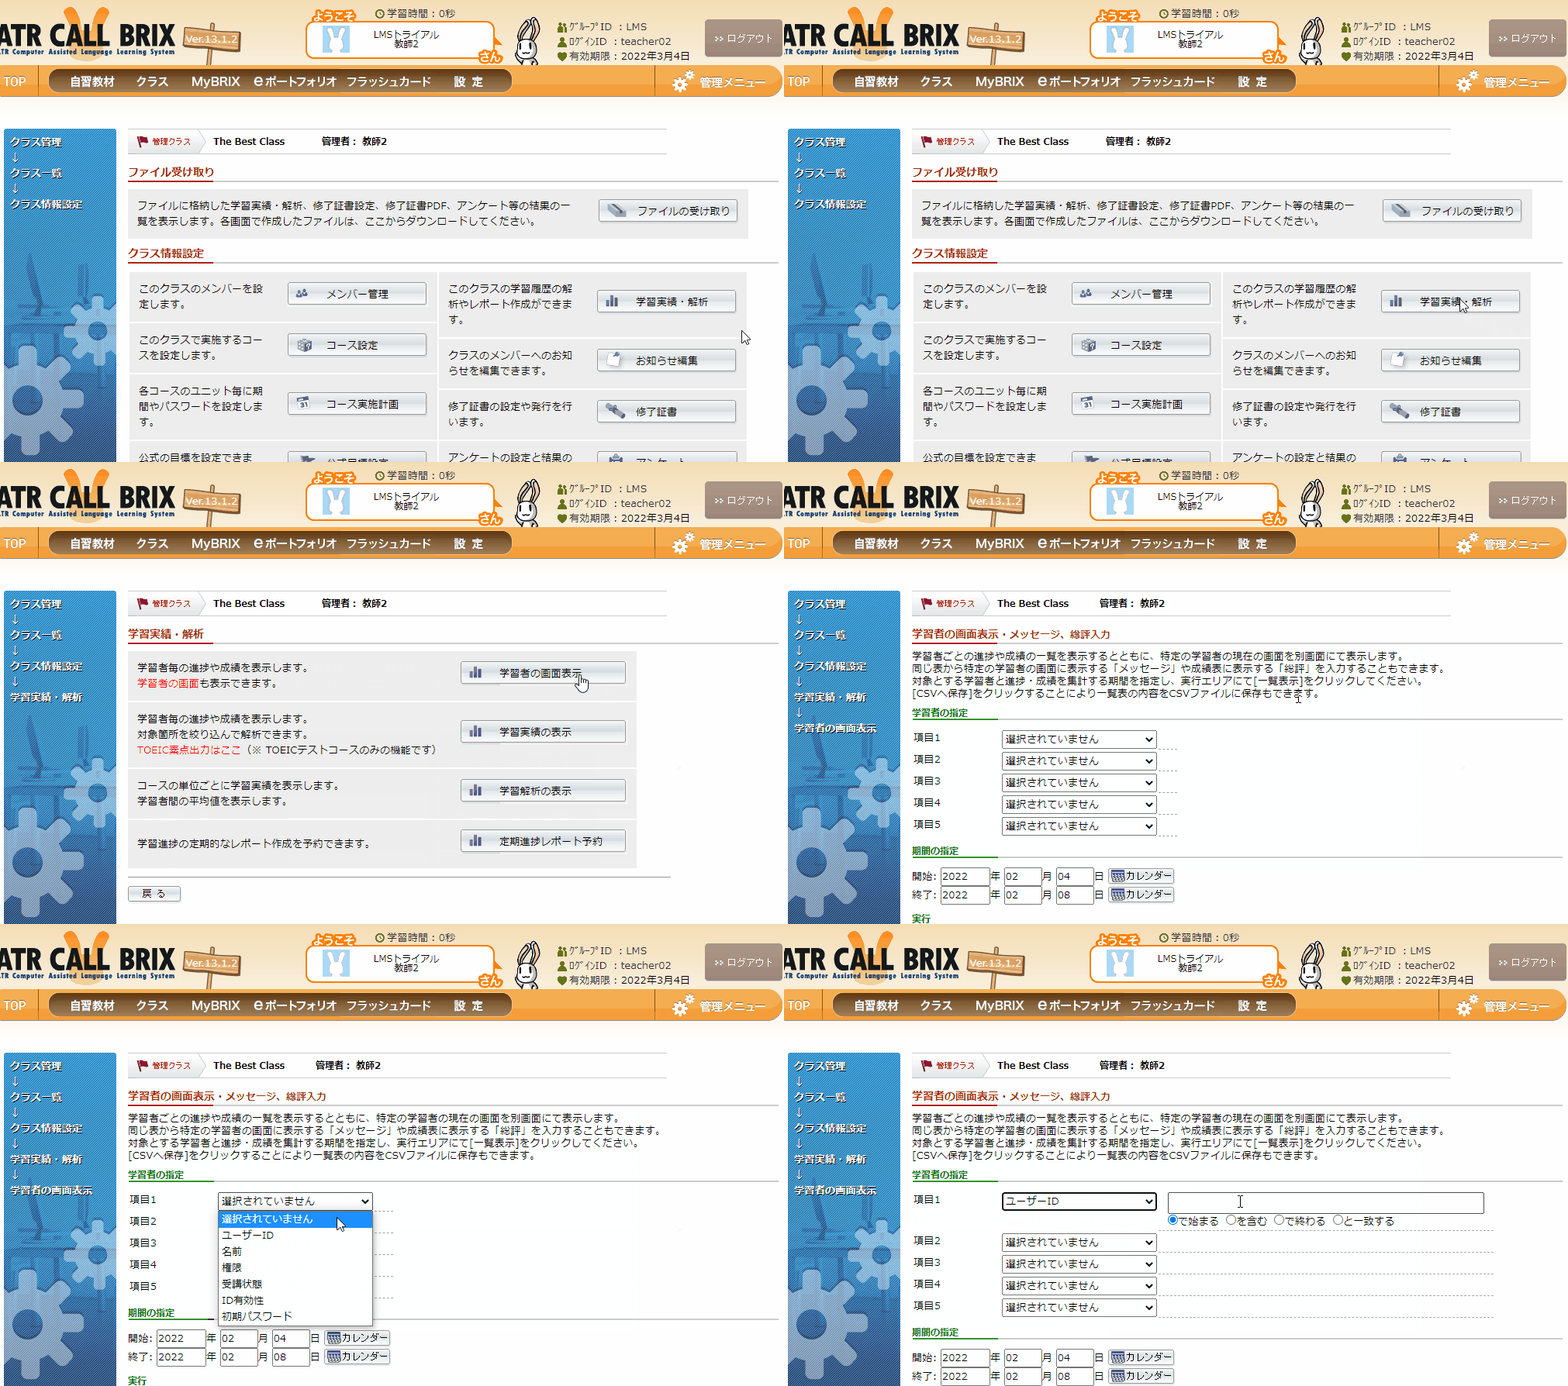
Return lists of students by entering vague searches
- Choose the start and end dates for the report
- Click the
一覧表示button (bars next to the name)
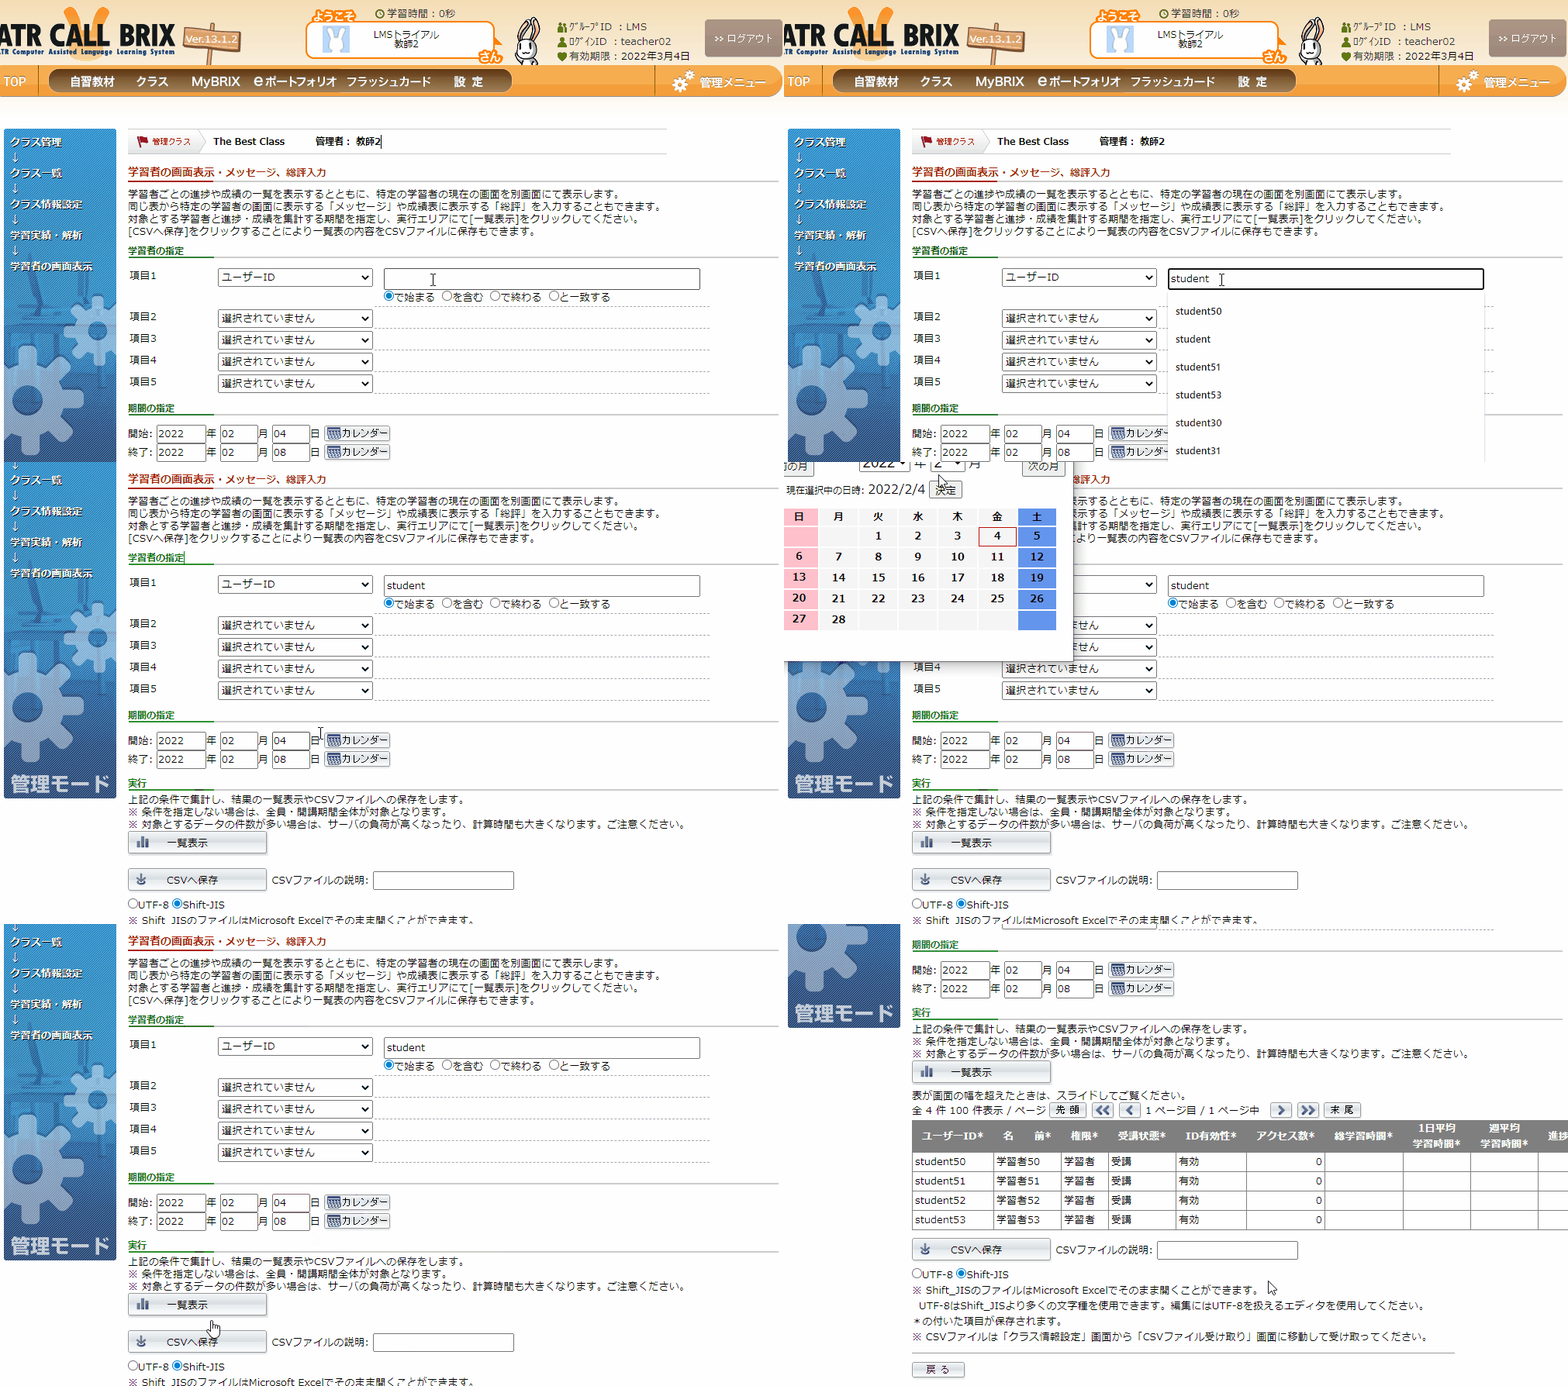
Table (left to right): [User id, Name, Type (Student/TA), registration status, validity, times accessed/studied, average daily study time, average weekly study time, percentage of completion, score, display student's homepage, message, comment, temporary password (first password)]
Clicking on 編集 in the メッセージ or 総評 section will allow you to send a message to the student.
Clicking on 表示 in the 現在学習画面 section will allow you to see what the student sees when they login.
Clicking on CSVへ保存 will save the results in a CSV file.
Checking Specific Courses
In the 学習実績一覧 section, the teacher/instructor can access grades for specific classes.
- From the class main menu, click
学習実績・解析 - Click the second button
学習実績一覧
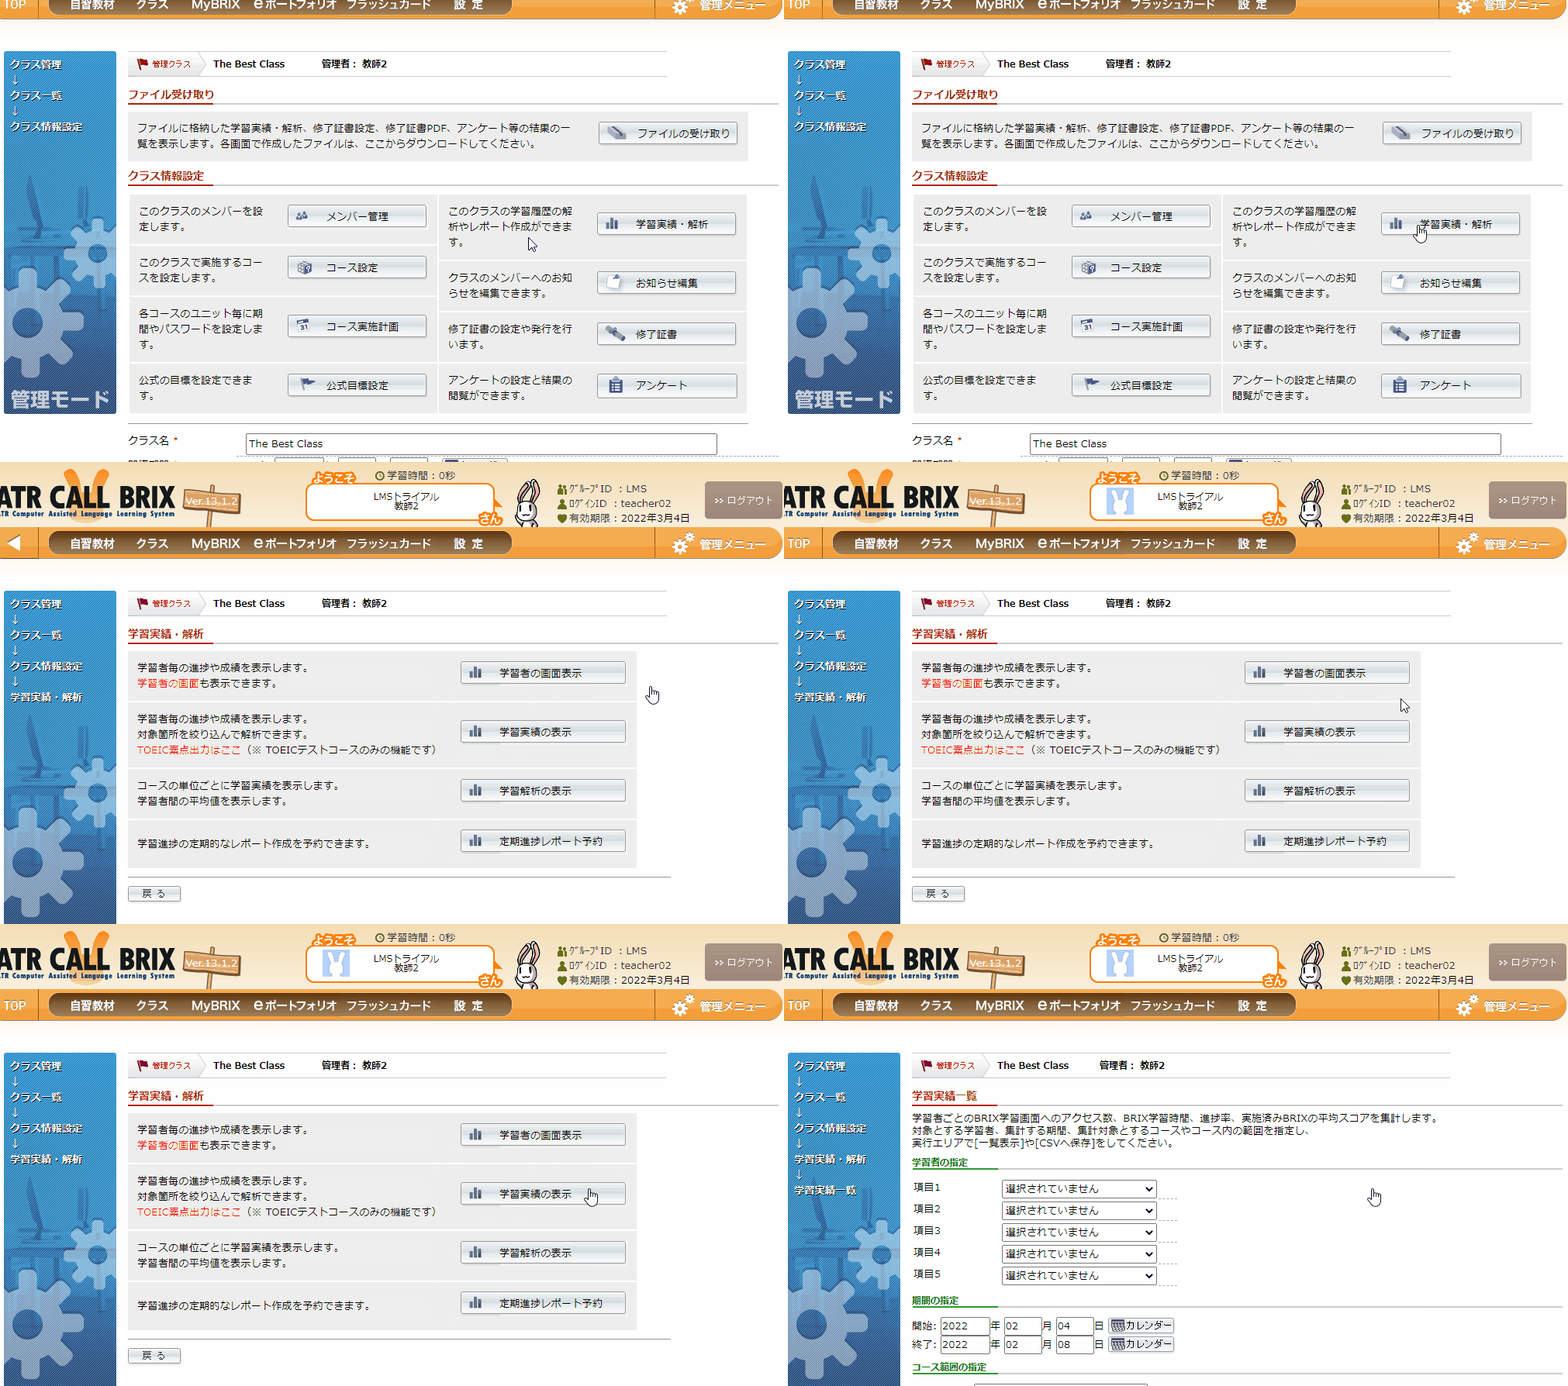
- Search for your student(s)
- Narrow your search by choosing a specific date and time
- Choose the course along with the specific part, unit, section and BRIX
- click the
一覧表示button
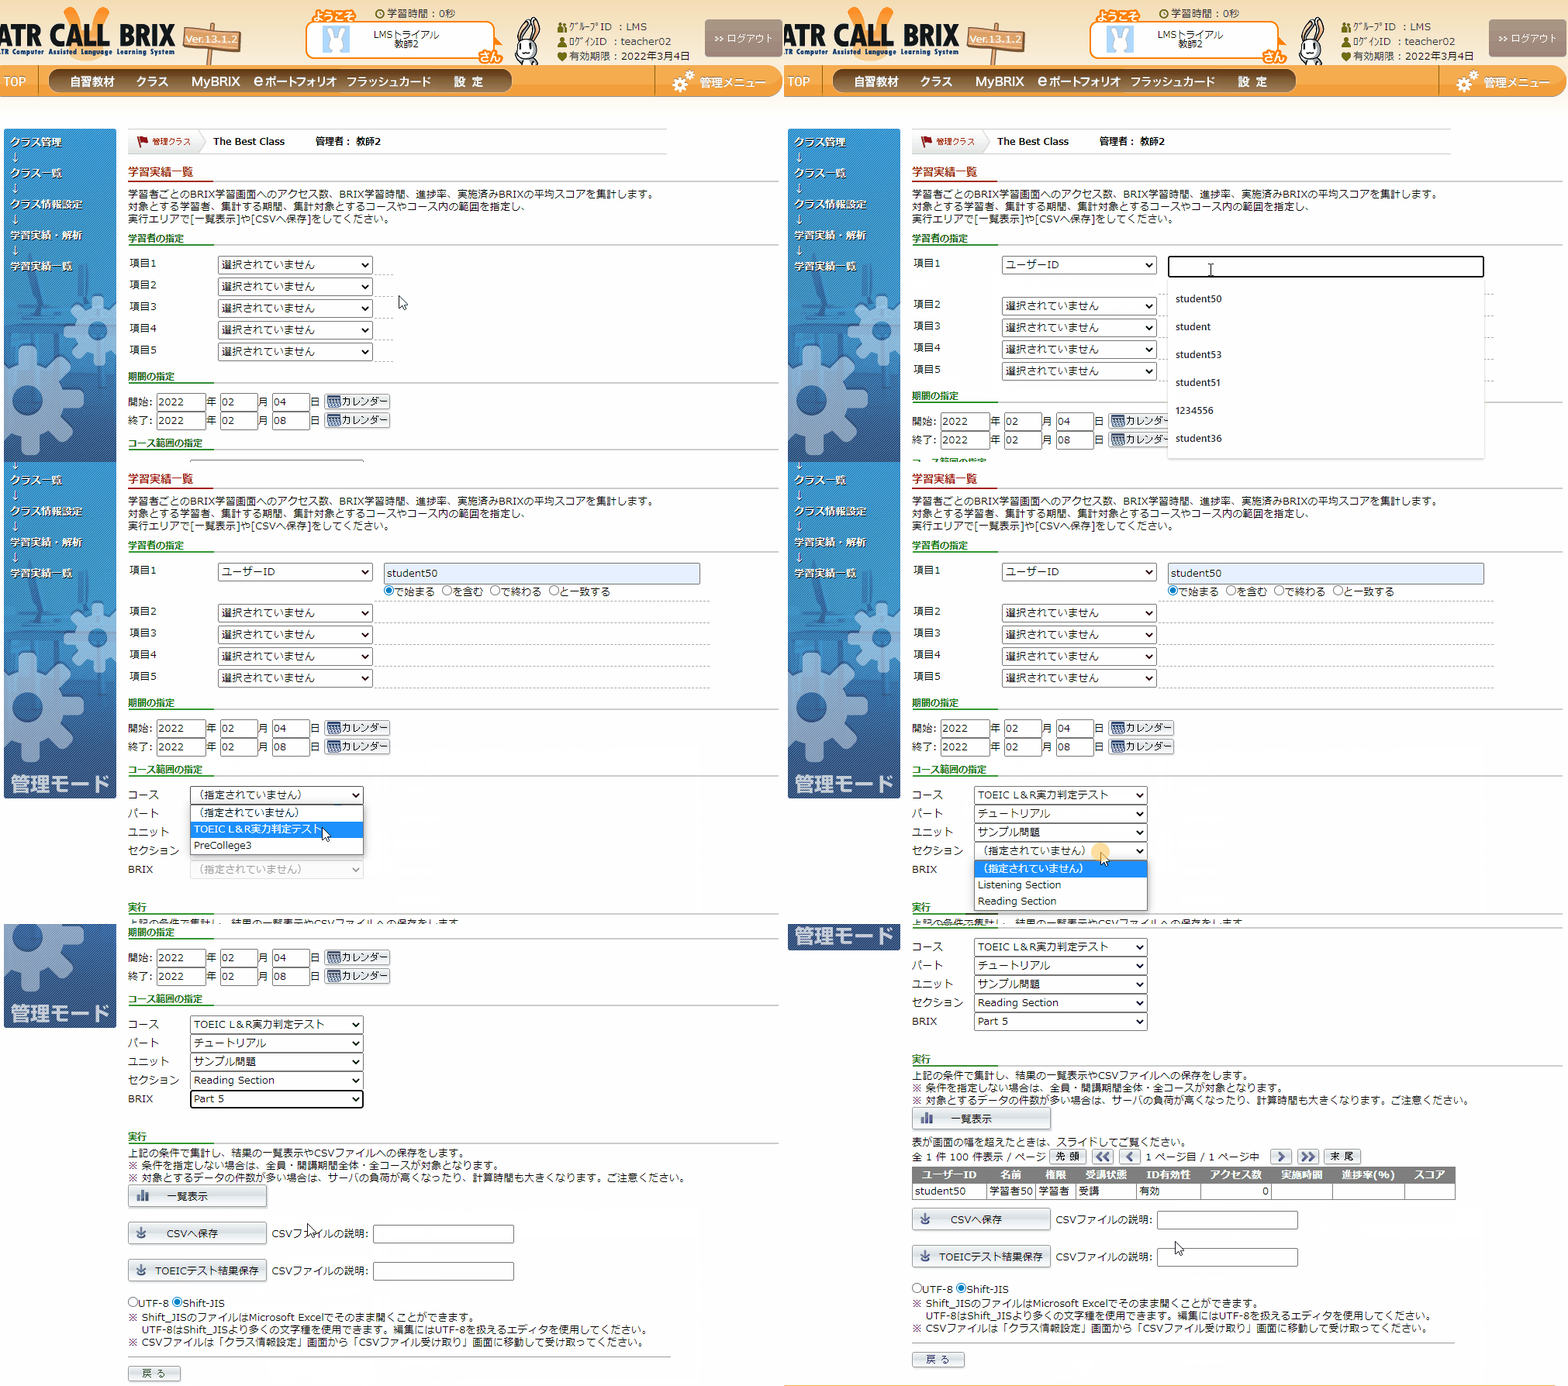
Table (left to right): [user id, name, type (student / TA), enrollment status, validity, times accessed/ study, time elapsed, percentage of completion, score]
If the course you chose was TOEIC, there is a special option for exporting all results for all sections of the test. It's a more detailed report.
Automated reports
The final button on the 学習実績・解析 page (Grades and Progress) allows you to set a date and time for automating reports. But so far, I (Justin) haven't gotten it to work.
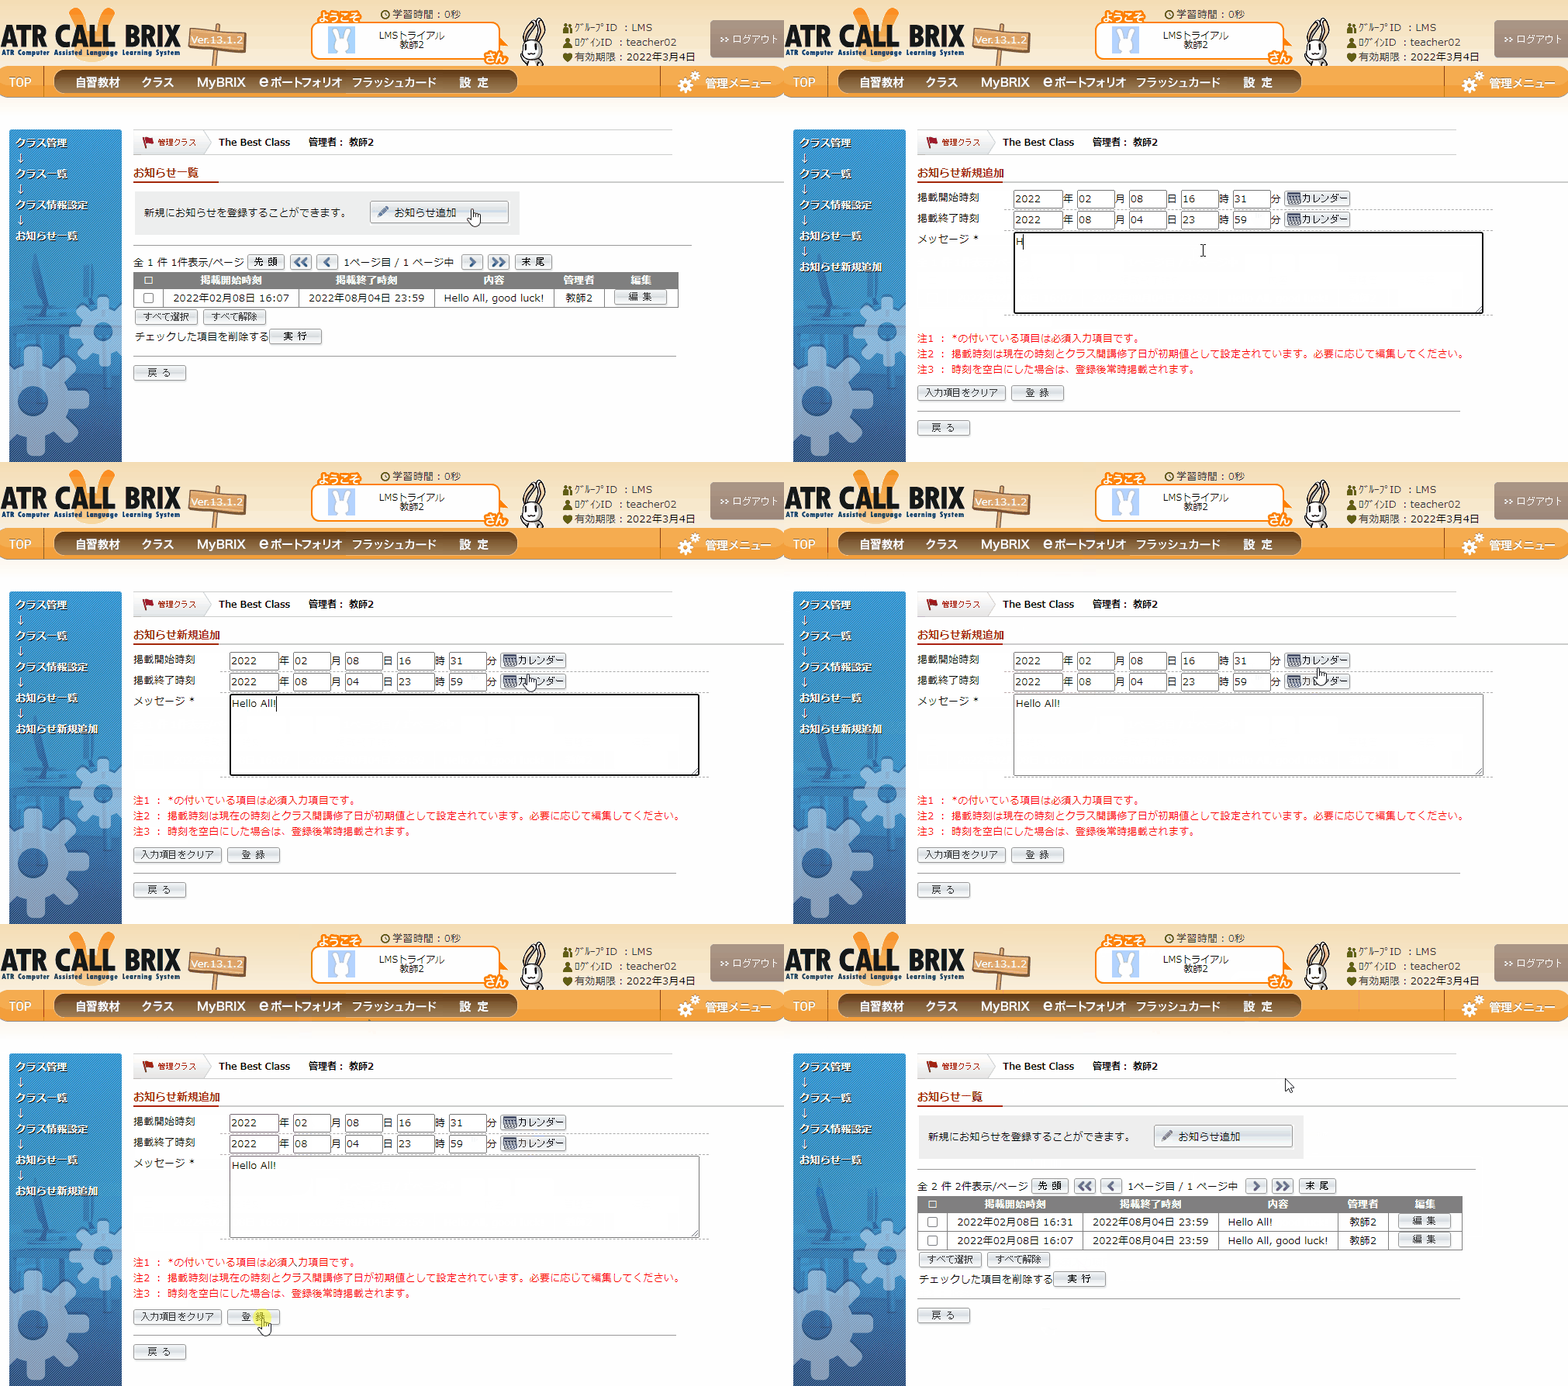
Sending and Posting Messages
The Teacher can send messages to his/her students. The message will appear on the students Class page.
- From the Class Management page
クラス情報設定clickお知らせ一覧
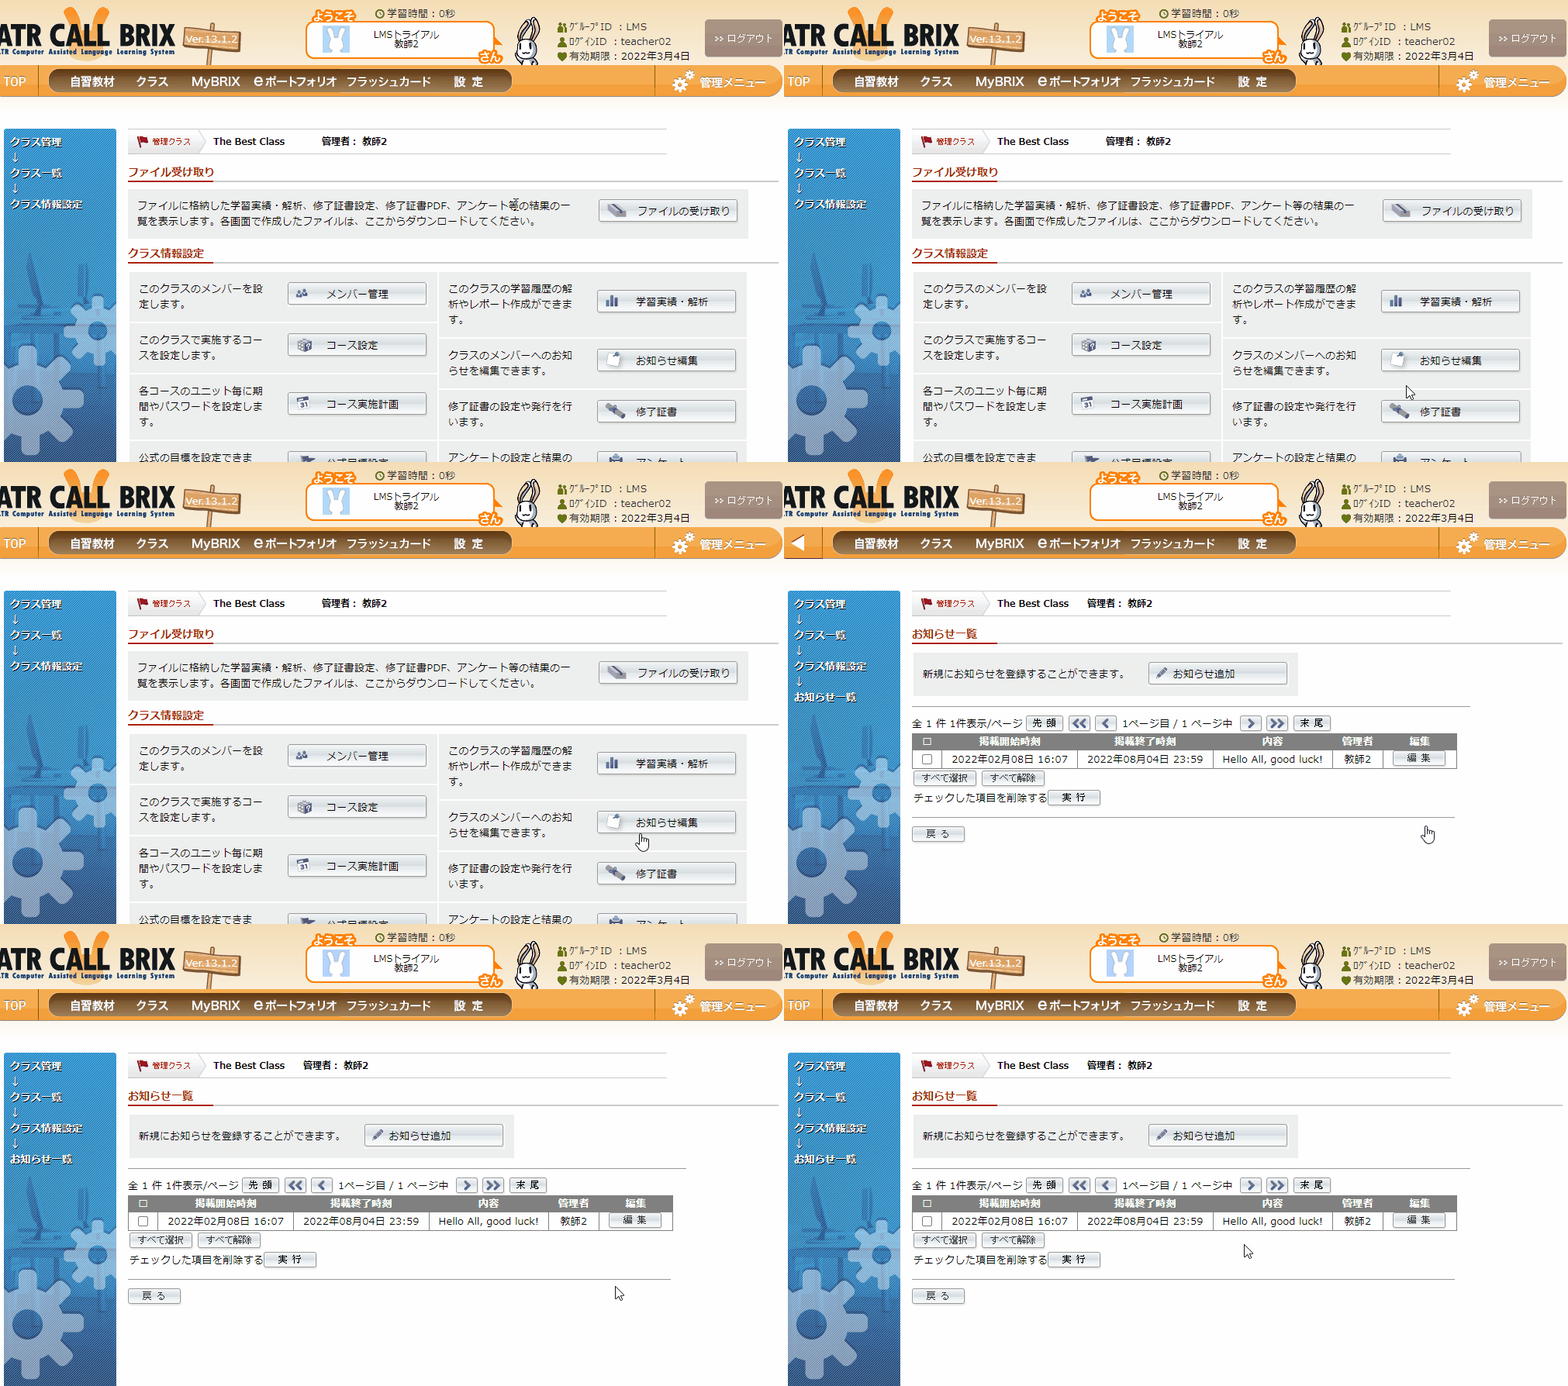
-
Click the button with the
🖊️ ,お知らせ追加 -
Select the post's start and end date
-
Type you message in the box and click
登録
